To create a Nonprofit Donation Form using WordPress offers an easy and effective technique. If you have a full-fledged WordPress website, then you can accept the donations easily on your own.
Let us discuss in detail and find out more about how effective the nonprofit donations forms are: The nonprofit donation form uses in-built advanced technology. It offers no complex techniques that make the forms simple and beneficial to use.
The form offers a number of benefits, such as:
Simple & easier techniques: The form is easy to create and easier to use by the people, who wish support & donate without any complications.
Effortless money transfer: It offers effective payment solutions that can be easily integrated into your WordPress site while accepting the donation under complete security.
Flawless connection & control: The form can be customized according to requirements and to keep connected to the donors all the time.
Let us find out the details of creating the Nonprofit Donation form in a step by step procedure:
Step 1: Using a Plugin to create a nonprofit donation form
You have to find out about the WPForms plugin which is one of the most effective WordPress form plugin available. In order to use the plugins, you have to refer to the guide – how to install plugins in WordPress? After you install the WPForm plugin successfully, select the following options:
Go to WPForms >> Add new Form (to create a new form)
To specify the form name in the setup screen
Select the option >> Donation Form template
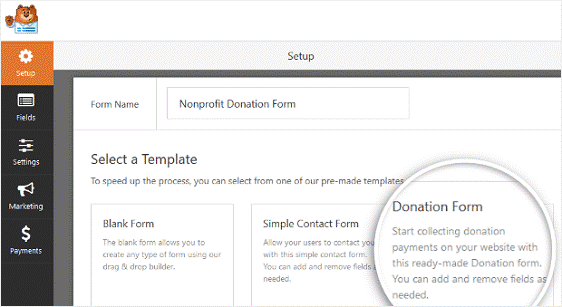
WPForms creates a form that is used for Nonprofit Donation.
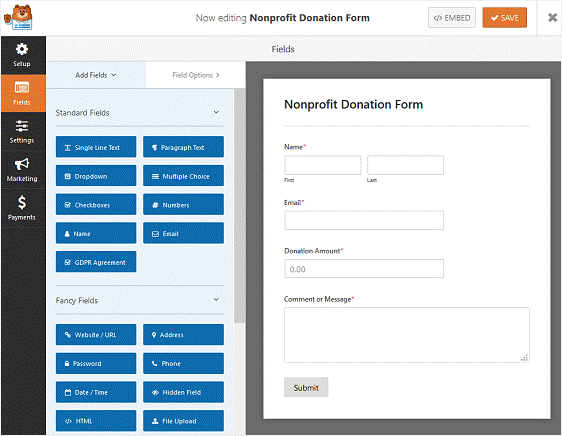
Step 2: Customize the fields used in the form
Minimum required fields preferred to use in the form are:
- Name of the person
- Email of the person
- Donation Amount Message or
- Message or Comment
You can add more number of fields, which are given in the left-hand panel, by dragging into the right-hand panel. You can easily edit any of the specified fields by clicking on it and also you can change the order of the fields as per the structure of your donation form.
To make the donation form user-friendly, you can make use of multiple-choice options or dropdown fields.
For example, the donation field can be designed using the dropdown field. It can display several donation amounts that can be easy to choose while filling the form. For the users the option is given to select the donation amount from the dropdown list, to click and choose into the donation field of the form along with an option to enter an amount into the field.
Payment Fields displayed in the right-side panel and the option Multiple Items are a part of it that can be used in the donation form as the Donation Amount field.
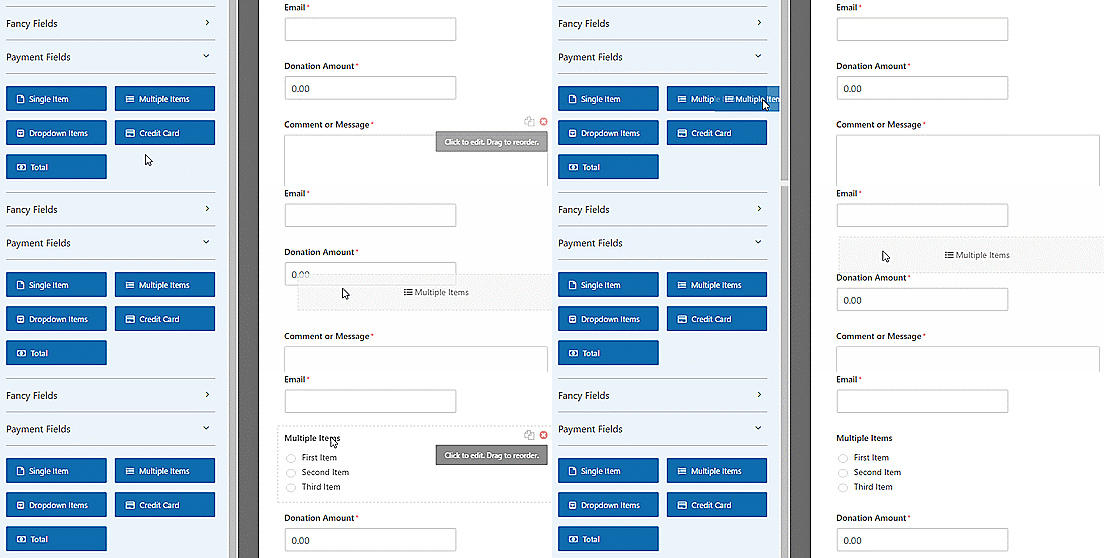
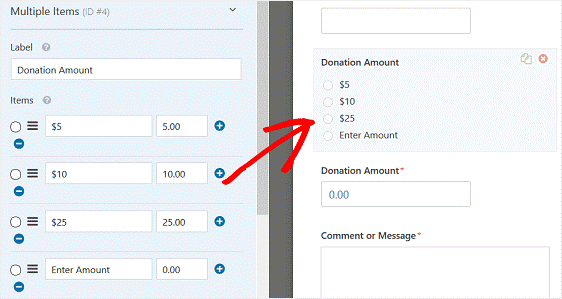
Select the form field multiple items that are placed in the Donation Form and make the following changes:
Change the label as – Donation Amount
Change each item in the form field with different donation amounts
Choose the next item and change its name as – Enter Amount
Select the option for entering Comment or Message
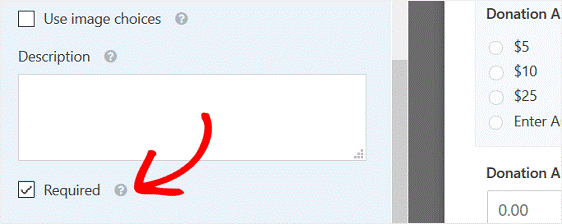
Also, choose the Checkbox – Required. When the Checkbox is selected, it makes sure that the form is filled by entering a donation amount before it is submitted.
Enter Amount should be selected to display the single item form field in the donation form.
Select the form field “Donation Field“, to customize it according to the required changes.
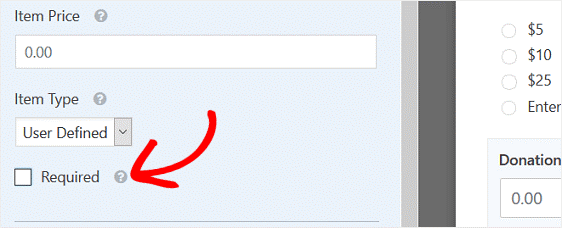
Undo the selected Checkbox option Required so that a pre-defined conditional statement can be added for the entering the donation amount.
Scroll down to the dropdown menu having labeled as Conditionals and Checkbox Enable conditional logic should be selected.
Choose the option Show this field if – specify the condition as – Donation Amount is Enter Amount.

The selected options help the user to choose the Enter Amount multiple-choice options; it displays the form of field Donation Amount. You enter all the fields and save the form.
Step 3: Configure the General Settings of the Form
Several settings of the nonprofit donation form can be configured in WordPress:
Let us choose the option Settings >> General
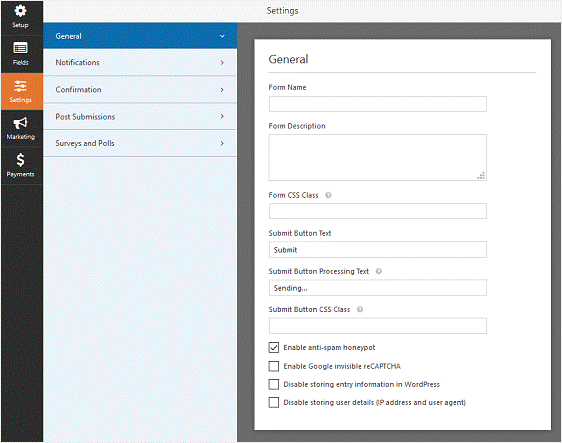
Here you can configure the following:
- Form Name: Form name can be decided as per your choice.
- Form Description: Specify form description in short.
- Submit Button Text: Customize the submit button.
- Spam Prevention: Honeypot feature or Google reCAPTCHA can be used with Stop contact form spam. The honeypot feature gets automatically enabled on the WordPress form. In case of another form of spam prevention, you can undo this option.
- AJAX Forms: AJAX settings can be selected with no page reload.
- GDPR Enhancements: In order to disable the user details in the form of IP addresses, user agents & other details as per GDPR requirements. You can check the step-by-step instructions given by using the GDPR agreement field, to add it in your contact form.
Save the form, once you complete the above settings.
Step 4: Configure the Notifications as per requirement.
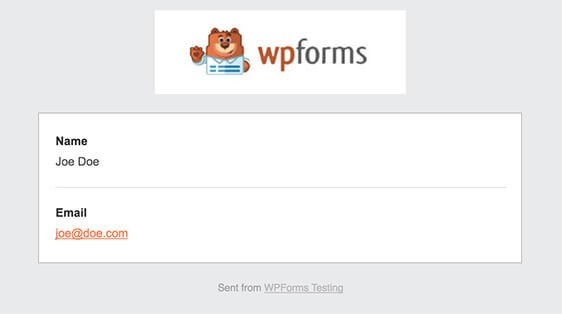
Notifications are useful in knowing the details of the donations made on your website and also to thank donors by sending emails.
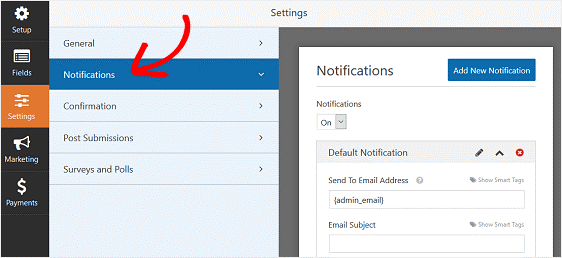
The notifications are important to know about donations made. You will get an immediate message giving details of the notification made.
Make use of use smart tags, it is a feature that helps you to send messages to the site visitors, who make the donation. You can send a thanking message which says you will get in touch with them shortly. It is also a simple way to confirm that the form is working.
You can get a lot of help on how to set up form notifications in WordPress. You check out the relevant documentation in WPForms.
In case of more emails to be sent to the donor, you can refer to the following topic and find out more detailed information on how to create multiple form notifications in WordPress.
Also to customize your emails and to add the branding factor in your emails then, you should refer the following topic adding a custom header to your email template using WPForms.
Step 5: Configure the Confirmations used in the Form
Form confirmations are customized messages. These messages are useful for the site visitors who wish to donate. The messages allow the users to know the procedure and the series of steps while using the form for donations.
WPForms offers three different types of confirmations to choose in the form:
- Message: It is a confirmation by default in the WPForms. A simple message is sent to the site visitor who donates. It helps in knowing the donor that the donated amount is received. To offer meaningful messages you can refer to the topic of great success messages in WordPress.
- Show Page: The confirmation allows the site visitors to visit a specified web page of your website, where the thanking message will be displayed. You can check out more information about Redirecting customers to a thank you page or find articles on creating effective Thank You pages in WPForms that encourage the donors and their loyalty.
- Go to URL: Redirecting the site visitors to another website after they have donated successfully. It can help the customers to know more about the company, its services, and the products offered.
The confirmations allow the customized messages to be sent to the donors after receiving the donation amount.
To customize messages, click on the Confirmation tab in the Form Editor under Settings.
Let us select the option Message and customize it.
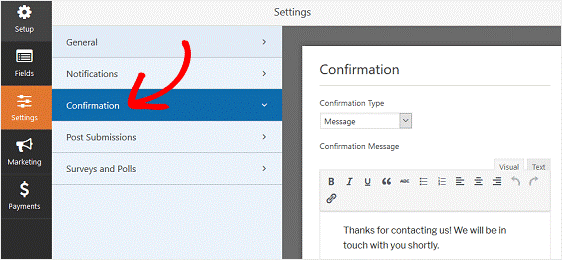
Customize confirmation Message with a suitable message which can be formatted with font, size, and color. You have to save the changes made.
To customize other configurations, check the documentation of setting up form confirmations in the WPForms.
Step 6: Configure Payment Settings of the Form
Payment options are needed to configure for accepting the donation made by the visitors.
WPForms can be used along with the options PayPal and Stripe for payment acceptance. You can find out more about the payment settings in the documentation of WPForms.
In order to configure the payment settings of the donation form, you have to install the payment addon and activate it. Check out the tutorials given in WPForms on installing and using the PayPal addon or installing and using the Stripe addon.
PayPal configuration settings to process donations
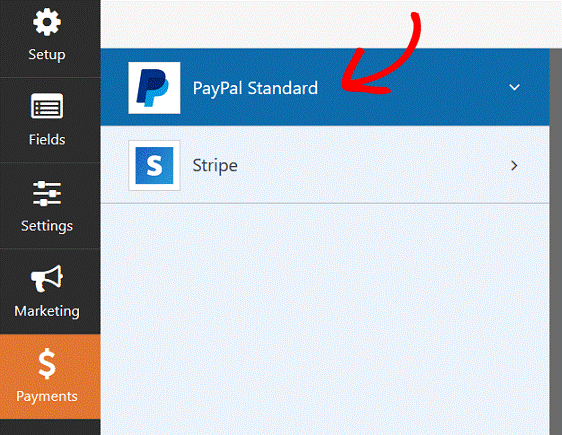
Let us configure Paypal standard payments as a part of the donation form:
- Select the option Paypal and enable the checkbox
- Enter the details of the email id that is registered with your Paypal account.
- In order to test the configured Paypal account, you can make use of Production Mode and Test/Sandbox options.
Find more about how to test PayPal payments and how to test Stripe payments. Refer to the tutorial given in WPForms before using it for donations.
- Select the payment type as Donation
- Redirect the site visitors to a certain URL if they fail to complete the PayPal donation process
- Select the preferred options for shipping
- Also, the option Notes with payments should be selected, if required.
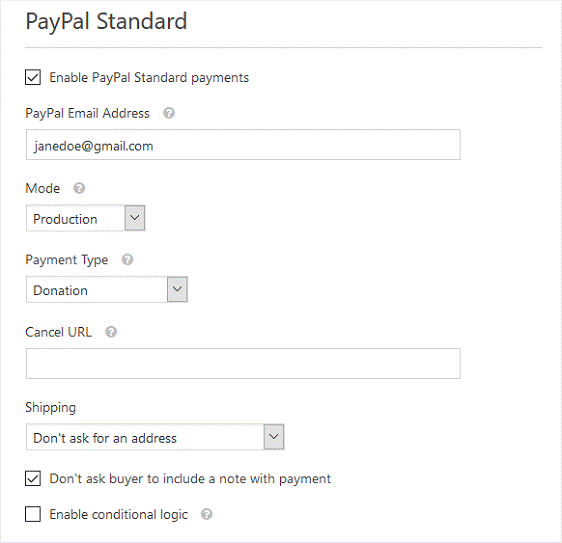
Save the changes made in the donation form configuration.
You can make use of the tutorial on allowing customers to choose their payment method from WPForms to make use of other payment methods.
The Donation form is ready for you to use now, which can be made available on your website with all the useful options.
Step 7: Adding the Nonprofit Donation Form to the Website
The donation form can be allowed to add to several locations such as websites, web pages, and blog posts. It can be added to the widgets on the sidebar using the WPForms setting.
Let us find out about – how to add the donation form to the WordPress website?
To add the donation form in WordPress, click on the Add Form button.
- Select the donation form in the modal popup
- Click the button Add Form.
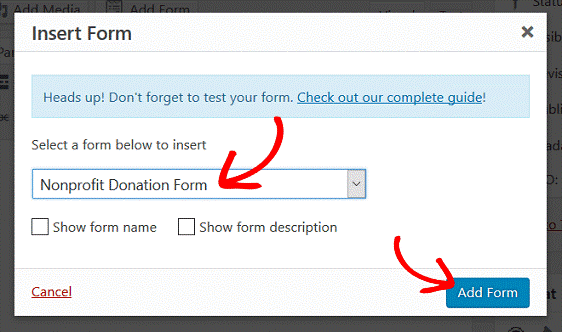
The donation form gets added to the website successfully. When you publish the website, the donation form will appear as a part of your website.
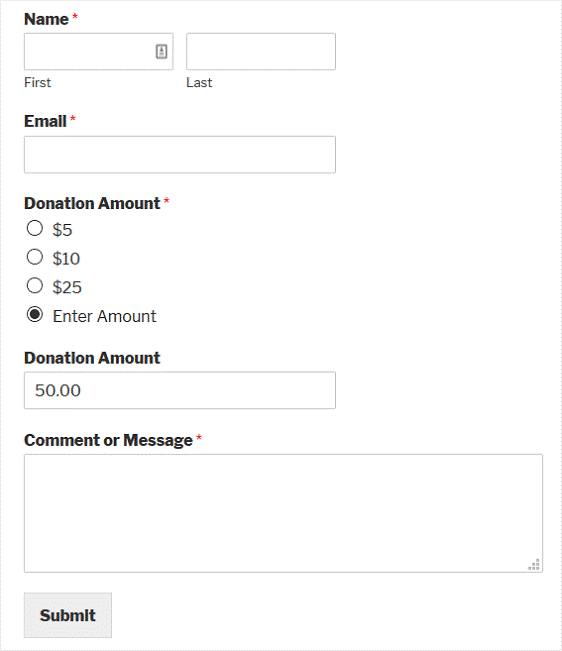
The Donation Form becomes a part of the website and it gets displayed as follows:
To remain in touch with the donors, you can make use of various Email marketing services – such as Mailchimp, AWeber, GetResponse, Drip
Final Thoughts
This is the simplest procedure for creating the nonprofit donation form in WordPress. You can refer to WPForms.com to get more information regarding creating different types of non-profit donation forms. The most powerful WordPress forms plugin is very effective and highly useful while dealing with online donations. Nonprofit Donation forms are very useful today.

